
Security testing is an area that is often neglected, and one that really shouldn’t be. Not only is it one of the most important factors for any publicly facing project, but the number of static and dynamic code analysis tools for Security Scanning are more common than ever. These tools make checking for vulnerabilities so easy that there really is no reason not to use one. Of the various tools out there for Software Composition Analysis by far my favourite is Meterian.
What is Meterian?
Meterian is a Software Composition Analysis tool, but what does that mean? Well, it scans your code and checks the packages you are referencing, and the packages that they reference etc. and compares this information against its Componetpedia. The componentpedia contains records of known security vulnerabilities for millions of packages across a massive range of languages. When I say massive, I mean it, it includes:
- Perl
- PHP
- Scala
- GoLang
- Swift
- nodejs
- .Net
- Rust
- Elixir / Erlang
- JavaScript
- Python
- Java
- Kotlin
- Ruby
So no matter what your tech stack, they are going to be able to provide coverage! Pricing is pretty reasonable too, I mean, it starts at free, and you can’t get better pricing than that! Even at the free level, you get full access to the tool – although you are limited on number of scans per day, and restricted to one private repository. This is more than enough to get hands on and see what it can offer.
What’s so good about it?
Has the massive range of coverage not got you convinced? Well on top of that, it’s easy to sign up for an account, takes just a few seconds to setup and has clear, easy to understand reporting. I’ll dive into each of those below.
How to setup Meterian
For the following example, I am going to assume you are using GitHub. In which case adding a GitHub action to run the Meterian scanner couldn’t be easier.
Sign up to Meterian
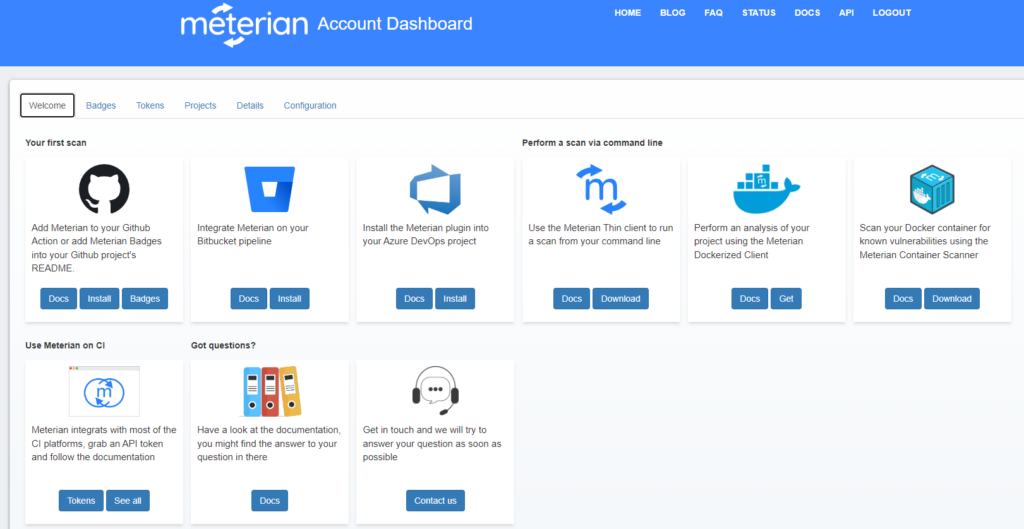
First of all, go to meterian.io and sign up for an account. You can use an existing GitHub or Google account to do this. You’ll then be greeted by a screen like below
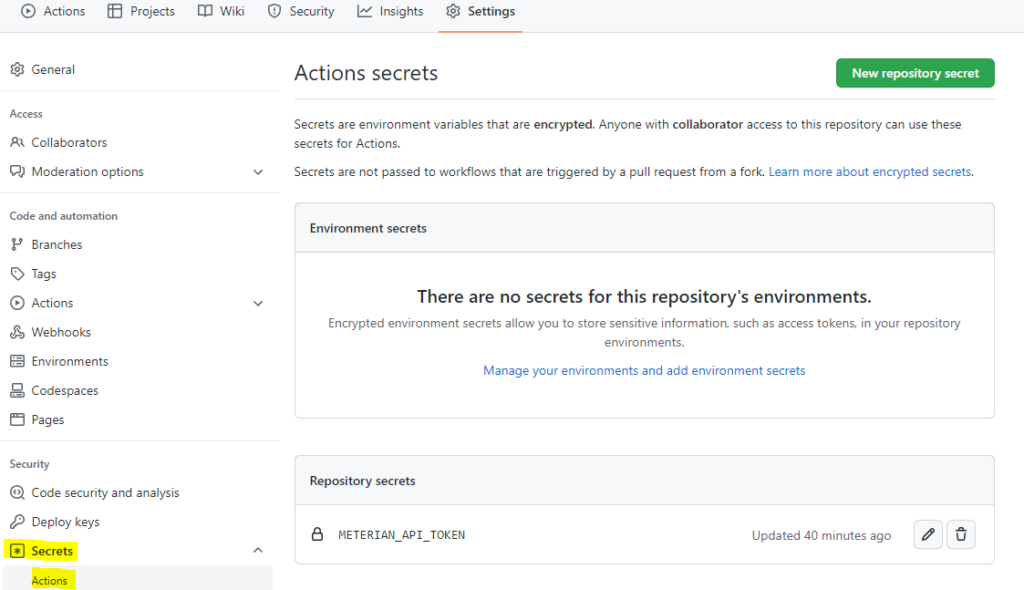
From here, go to the Tokens tab and generate a token. Now go to your GitHub repository and store the token as a new Actions Secret called METERIAN_API_TOKEN
Create your GitHub Action
Now, create a pull request to add a YAML file to your .github\workflows file like the one below

You can see my implementation in the repository for my Automated Monkey Testing example project.
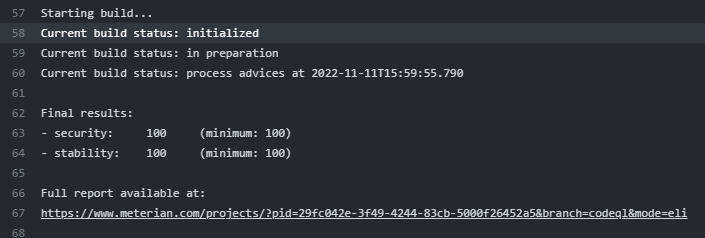
This will trigger your first scan using Meterian. Don’t worry if this takes a couple of minutes, the first scan always takes the longest. Once the scan is complete you will have an entry in the output from the action like this.
Configure Meterian
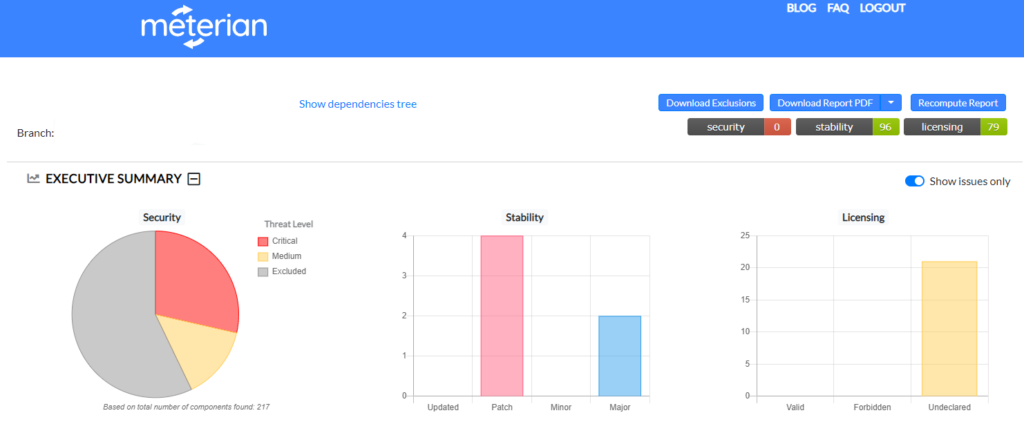
Click the link and you will be taken to the full report in Meterian, which will look something like this. For more on reporting see the Meterian Reporting section of this post
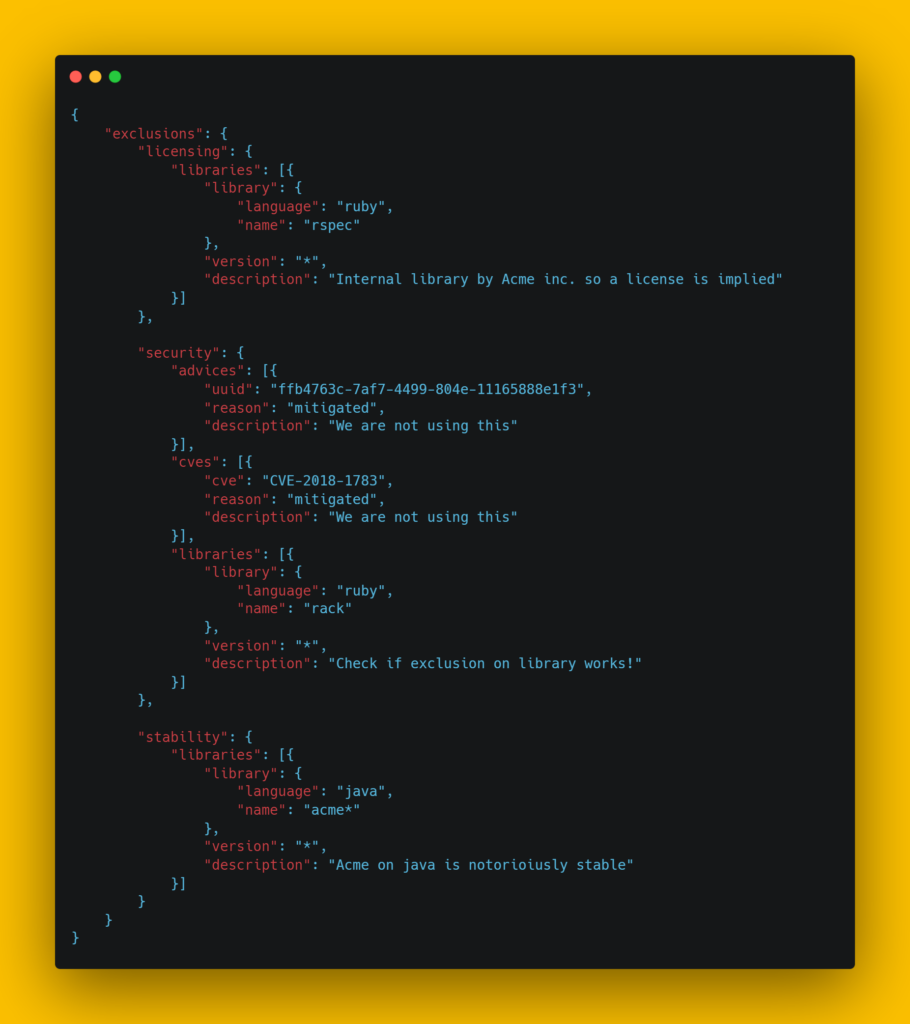
From here you can inspect the findings and take action as required. Generally speaking it is advisable to upgrade the packages to the latest safe version – Meterian will provide this in the analysis – or switch to a different package if not safe version is available. Of course, it’s possible that you are unable to do either of those options, and may want to continue with a package, despite the vulnerability. For this, we need to create a .meterian file. The .meterian file lives in the root of your repository and contains a list of exclusions for Meterian. You can exclude based on package version or the vulnerability, which is particularly useful where the vulnerability is part of a package a number of your packages depend on.
The simplest way to generate a .meterian file is to use the GUI to select your exclusions, recompute the report by pressing the now red button in the top right, and then pressing Download Exclusions. This will download the required file and it should be renamed to .meterian and saved in the root of your repository. It’s contents will look something like this.
With your .meterian file added, you are good to go, and if using the YAML file provided above, Meterian will scan each pull request made against your repository.
Meterian Reporting
The scan reporting built into Meterian makes understanding your vulnerabilities exceptionally easy, even for engineers with little no familiarity with security testing. The reporting has a summary at the top showing you your scoring out of 100 for Security, Stability and Licensing, as well as counts for number of packages affected by any issues.
Security
For each package that has a security vulnerability you will get an entry like this.

It tells you the name and version of the package affected and a summary of the issue. It also advises which version the issue was fixed in, and the latest safe versions of the package that you may wish to consider changing to. The tabs give you more information about the risk, and where in your code the package is being referenced. Finally the Actions tab gives you the ability to exclude the package or vulnerability from future scans by adding it to your .meterian file.
Stability
The stability scoring is all about making sure that you are using the latest versions of the packages you are referencing. This section of the report gives you an overview of which packages aren’t up to date, and which the latest versions are.

Licensing
The final section, Licensing, automatically identifies the terms and conditions associated with your components to ensure compliance and avoid risk of being in breach of the terms for each package. Where appropriate licensing isn’t found, Meterian will highlight like below.

Summary
So in summary, if you are looking for a tool that can help keep your software more secure, I highly recommend Meterian. The low overhead nature of setting it up and allowing it do it’s thing along with its ease of use and clear reporting make it a must for me.
Subscribe to The Quality Duck
Did you know you can now subscribe to The Quality Duck? Never miss a post but getting them delivered direct to your mailbox whenever I create a new post. Don’t worry, you won’t get flooded with emails, I post at most once a week.
0 Comments
1 Pingback